 ## Step by step
### Step 1: Request a Link Token (server-side)
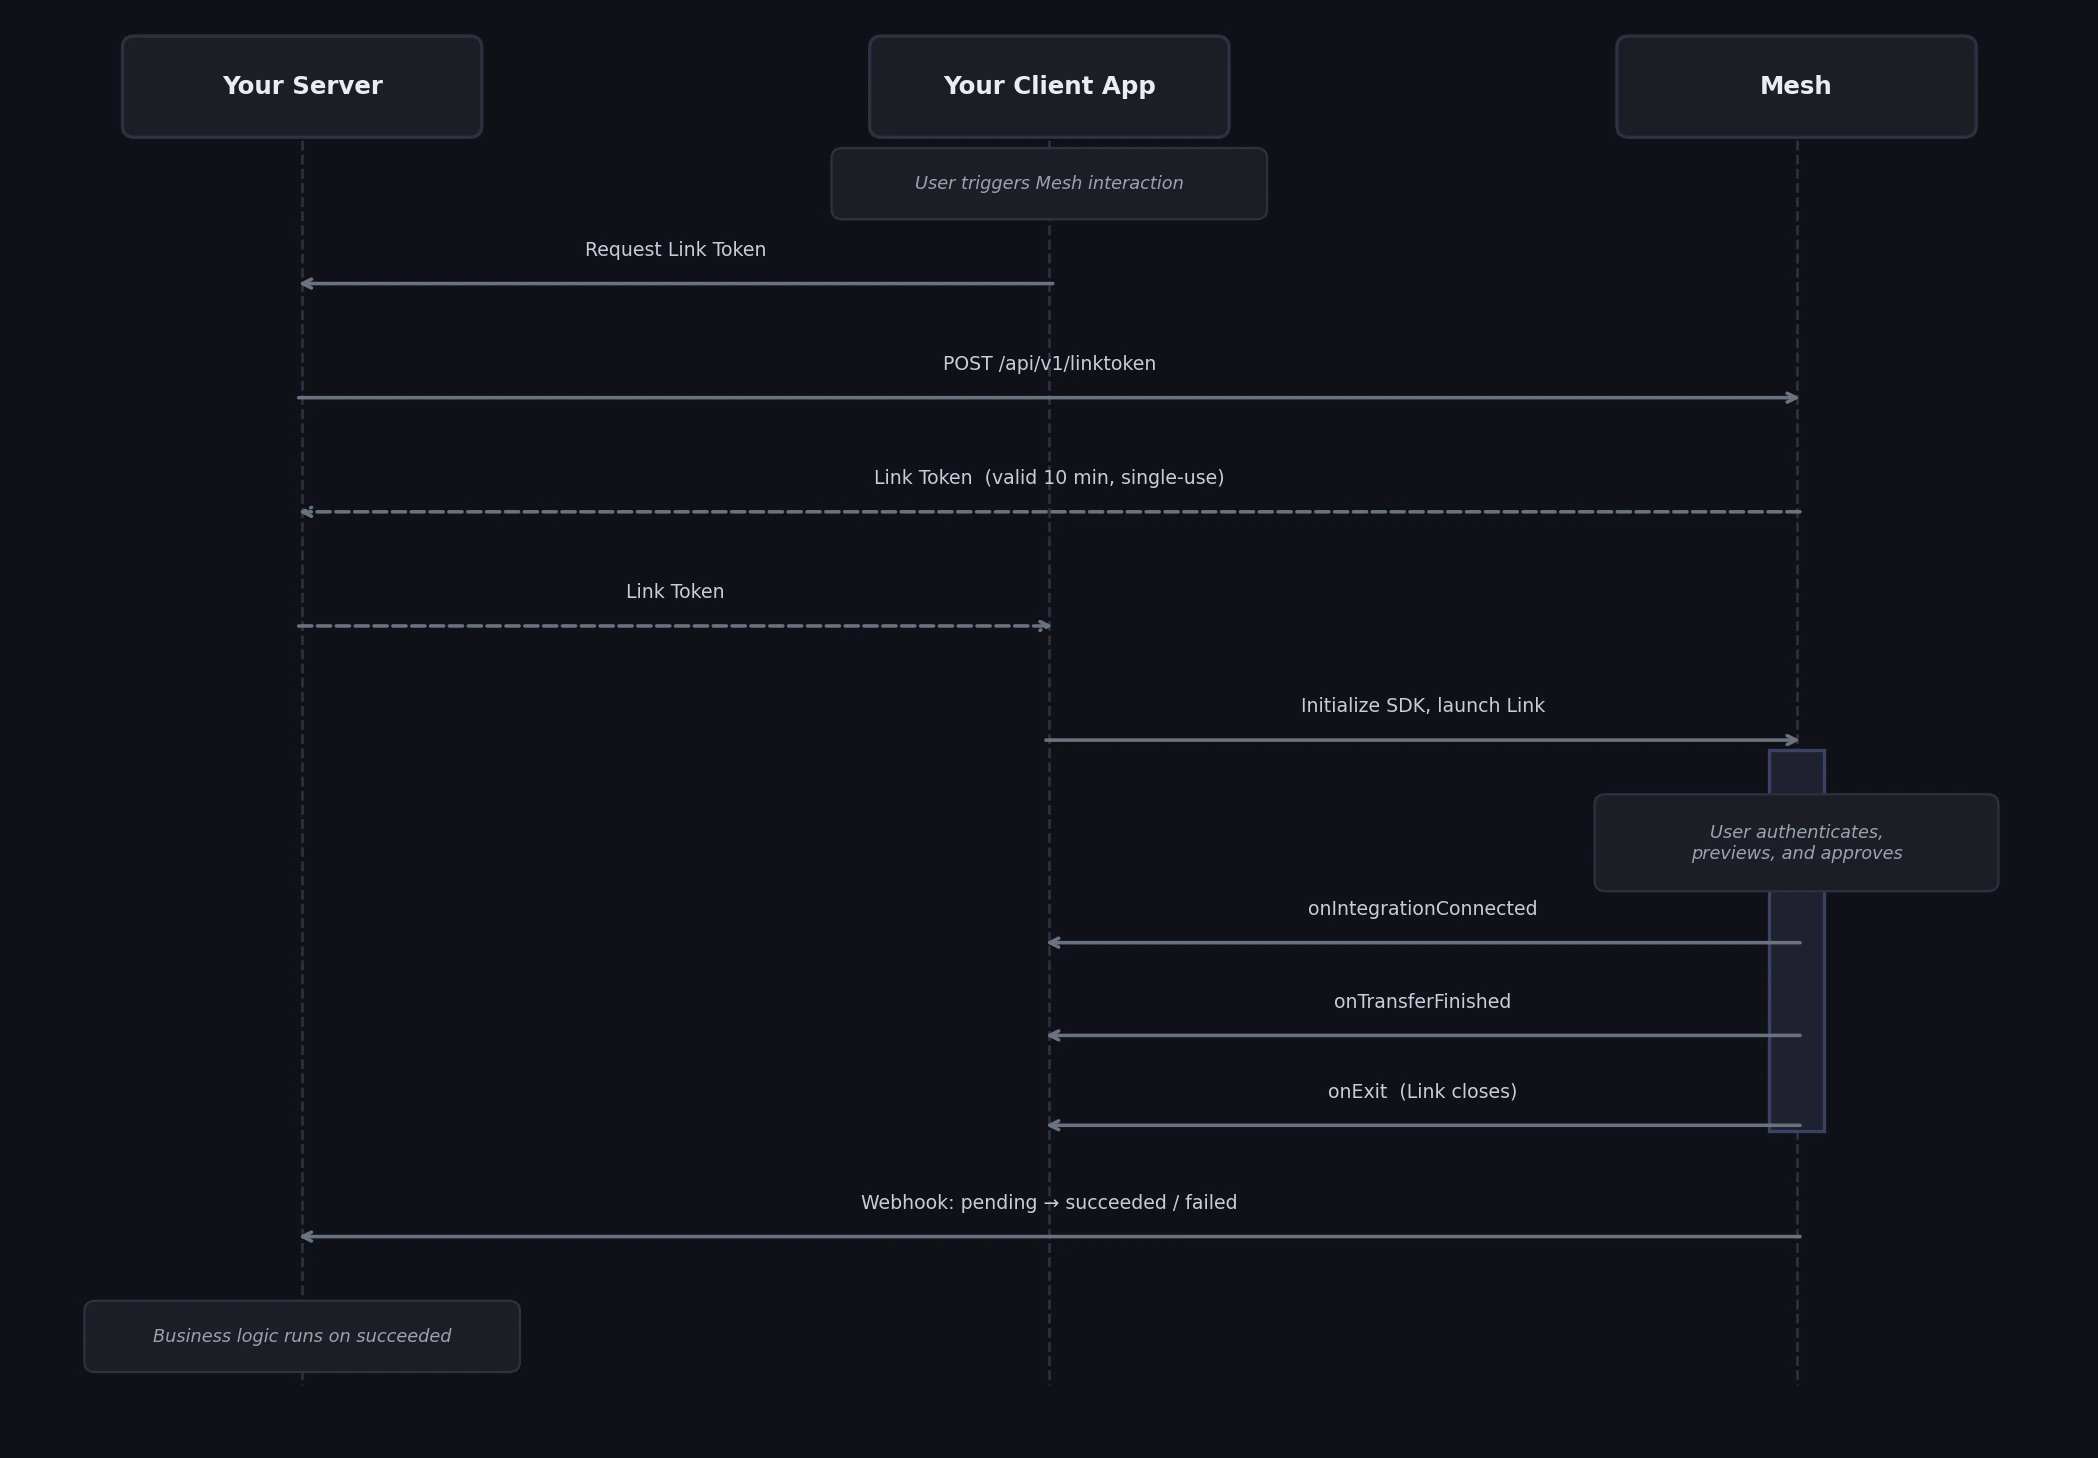
Every Mesh session starts on your server. When a user triggers a Mesh interaction — clicking a "Deposit" or "Pay" button — your server makes a `POST /api/v1/linktoken` request to Mesh.
This request configures the entire user session: transfer type (deposit, payment, onramp), destination address, amount constraints, supported networks and assets, display currency, and more. The Link Token encodes all of this configuration without exposing it to the client.
Link Tokens are short-lived (10 minutes) and single-use. Request a new one for each user session.
→ [Fetch a Link Token](/build/fetch-link-token) for use-case-specific examples and the full parameter reference.
### Step 2: Initialize and launch the SDK (client-side)
Your client receives the Link Token (passed through your own API), initializes the Mesh SDK with it, and launches Link. From this point, Mesh handles everything the user sees: the integration catalog, authentication flows, transfer preview, compliance steps, and success/error states.
Link is available for five platforms — Web, iOS, Android, React Native, Flutter — each with a platform-specific initialization pattern.
→ [Launch the Mesh SDK](/build/launch-sdk) for all five platforms, including overlay, embedded, and Paylinks options.
### Step 3: Handle SDK callbacks (client-side)
When the user takes a significant action inside Link, the SDK fires callback functions in your app. The four callbacks:
* **`onIntegrationConnected`** — fires when the user successfully connects their exchange or wallet. The payload includes an `accessToken` (with a `tokenId`) that you should store server-side to enable one-tap return-user flows.
* **`onTransferFinished`** — fires when a transfer has been submitted. Contains `status`, `transferId`, `txHash`, and transfer details. Use this to update your UI and trigger any immediate client-side logic.
* **`onExit`** — fires whenever Link closes, regardless of outcome. Check the `page` field to detect whether the user finished the flow.
* **`onEvent`** — fires for granular user interactions throughout Link. Useful for analytics and specific UX logic.
## Step by step
### Step 1: Request a Link Token (server-side)
Every Mesh session starts on your server. When a user triggers a Mesh interaction — clicking a "Deposit" or "Pay" button — your server makes a `POST /api/v1/linktoken` request to Mesh.
This request configures the entire user session: transfer type (deposit, payment, onramp), destination address, amount constraints, supported networks and assets, display currency, and more. The Link Token encodes all of this configuration without exposing it to the client.
Link Tokens are short-lived (10 minutes) and single-use. Request a new one for each user session.
→ [Fetch a Link Token](/build/fetch-link-token) for use-case-specific examples and the full parameter reference.
### Step 2: Initialize and launch the SDK (client-side)
Your client receives the Link Token (passed through your own API), initializes the Mesh SDK with it, and launches Link. From this point, Mesh handles everything the user sees: the integration catalog, authentication flows, transfer preview, compliance steps, and success/error states.
Link is available for five platforms — Web, iOS, Android, React Native, Flutter — each with a platform-specific initialization pattern.
→ [Launch the Mesh SDK](/build/launch-sdk) for all five platforms, including overlay, embedded, and Paylinks options.
### Step 3: Handle SDK callbacks (client-side)
When the user takes a significant action inside Link, the SDK fires callback functions in your app. The four callbacks:
* **`onIntegrationConnected`** — fires when the user successfully connects their exchange or wallet. The payload includes an `accessToken` (with a `tokenId`) that you should store server-side to enable one-tap return-user flows.
* **`onTransferFinished`** — fires when a transfer has been submitted. Contains `status`, `transferId`, `txHash`, and transfer details. Use this to update your UI and trigger any immediate client-side logic.
* **`onExit`** — fires whenever Link closes, regardless of outcome. Check the `page` field to detect whether the user finished the flow.
* **`onEvent`** — fires for granular user interactions throughout Link. Useful for analytics and specific UX logic.