Overview
One of the unique features with Mesh is enabling clients to build embedded experiences that enables retail users to transfer digital assets from either centralized exchanges or self-custody wallets to the client application without needing to copy and paste a target address on a separate platform. This document will guide you through integrating with our Link + Transfer SDKs and drop-in UI to transfer from either centralized exchanges or self-custody wallets for your users. Mesh APIs handle credential validation, multi-factor authentication, and error handling when connecting to each account. After an end user authenticates with their account credentials, clients will be passed authentication tokens to provide access to the account which allows client applications to initiate transfers on behalf of the user on the originating platform. Clients have the option of using Mesh’s pre-built transfer UI or building the experience natively using server-side calls. You can test the authentication and transfers functionality for yourself in our interactive demos. Using Mesh APIs, you can easily connect and transfer digital from the following types of accounts:- Centralized exchanges
- Self-custody wallets
- Transfers for self-custody wallets must use the Mesh SDKs
Introduction
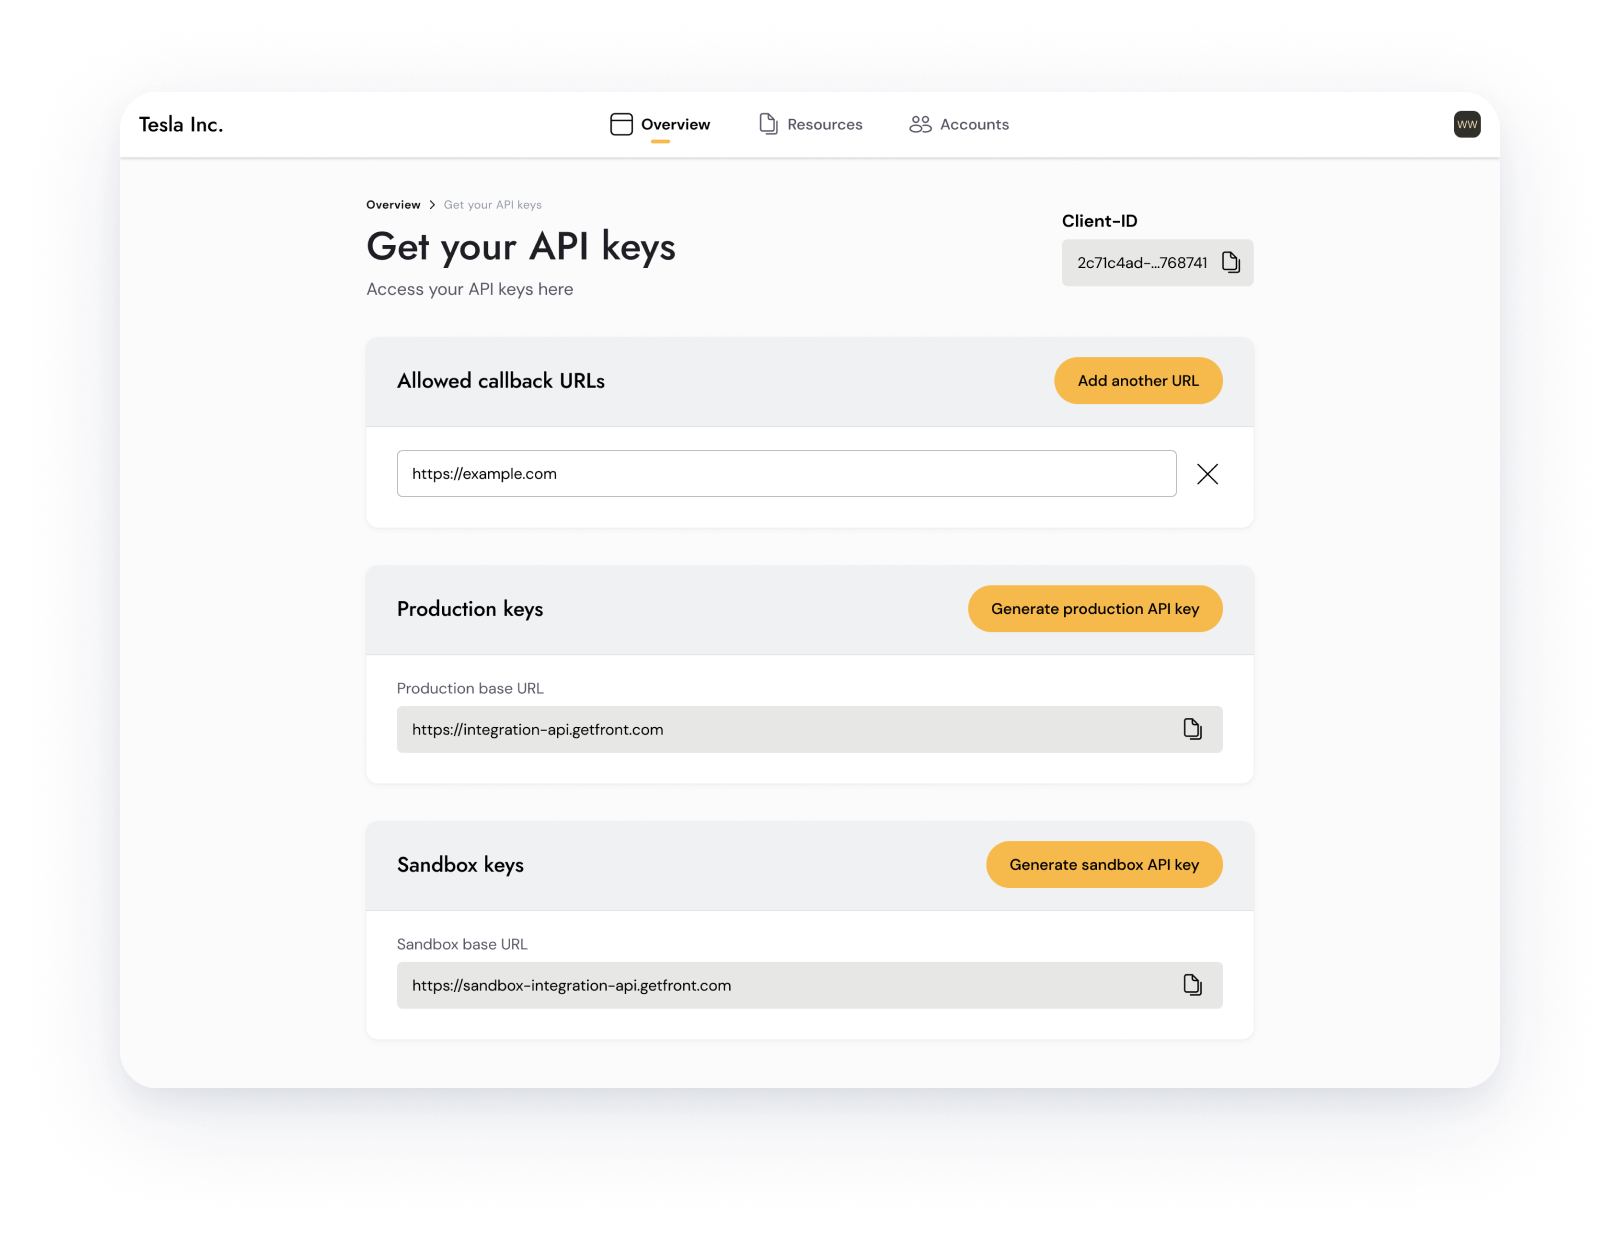
The fastest to get started with Mesh’s Transfers product is by testing the functionality via our interactive demos. Then, you’ll need to generate API keys, which are accessible after signing up for Mesh. You can generate two different API keys (one for Sandbox and another for Production), you should store the API keys immediately after generating them as they will no longer be viewable after leaving the page. You should add any ‘Allowed callback URLs’ for your local, staging and production environments, this will enable the Link SDK to correctly load. Note: you should add full URLs (e.g., http://localhost:3000/settings/user).
How the Link + Transfer SDKs works
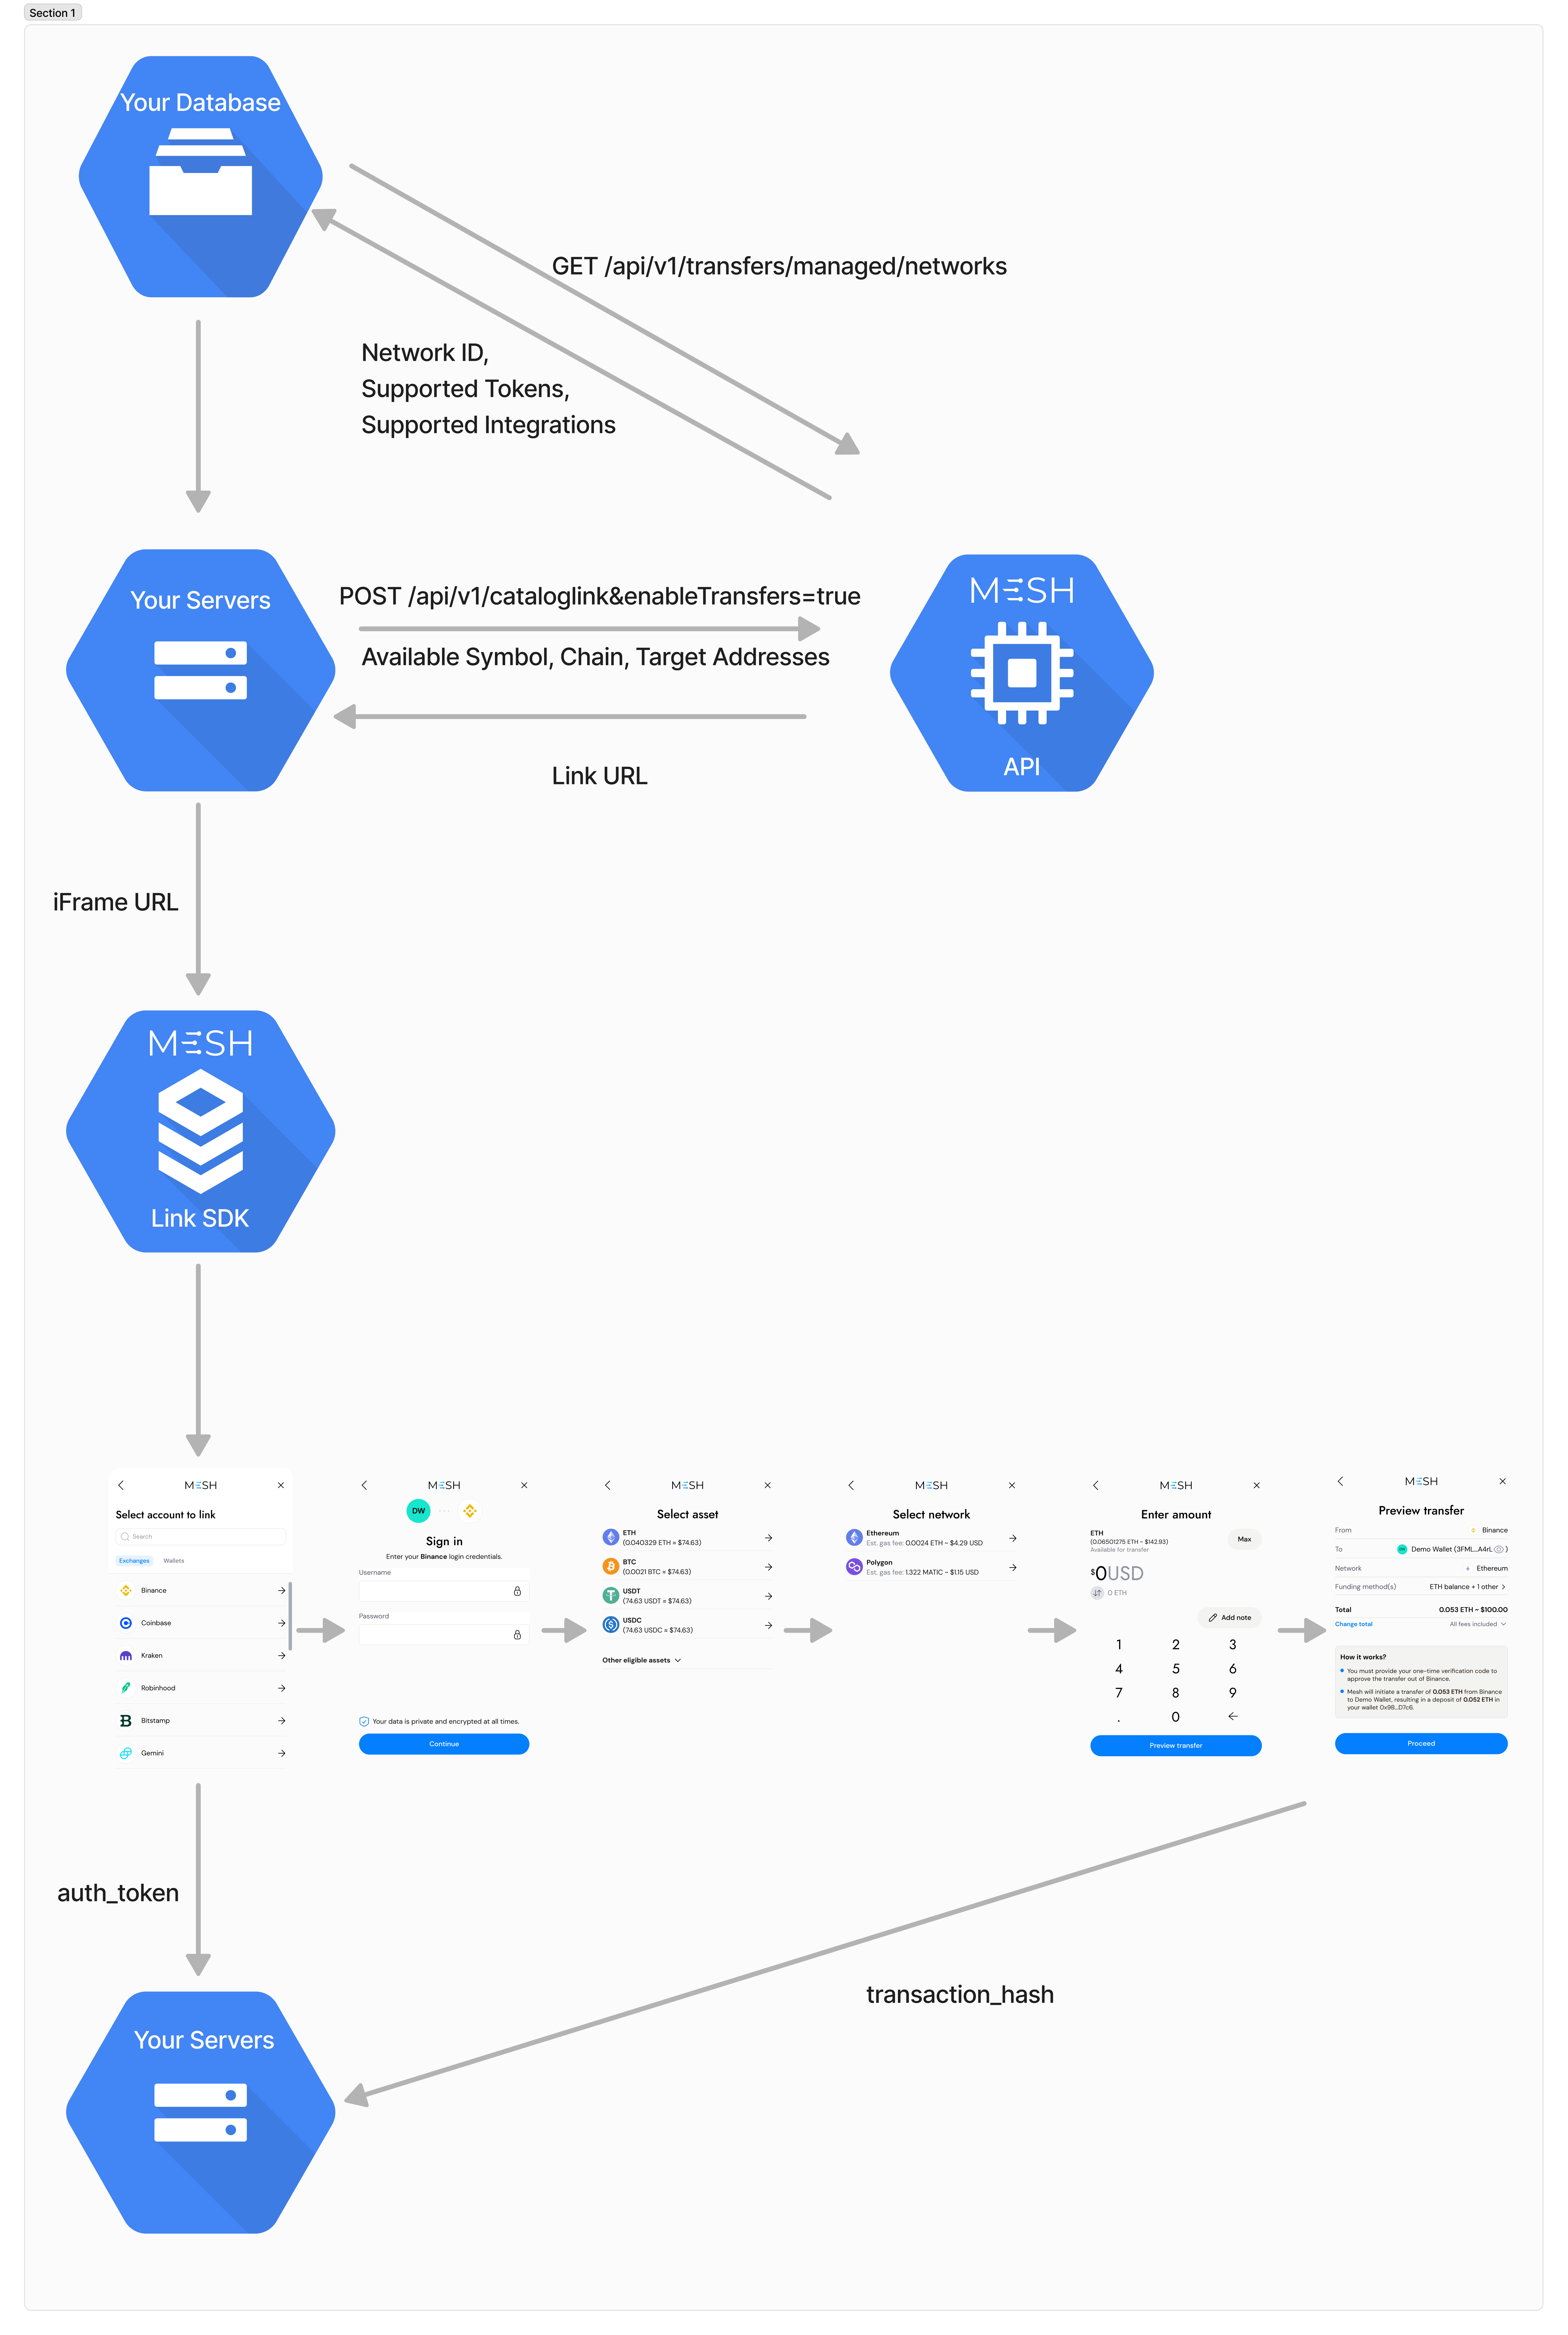
You will use both server and client-side components to facilitate a transfer with Mesh APIs.- Call Get Networks to get the network IDs and token symbols that you want to make available to receive assets.
- Call /api/v1/linkToken with a POST that includes the network IDs, token symbol and the target addresses that you want to make available to receive assets to create a link + Transfer URL. Make sure to include the parameter enableTransfers=true.
- Pass the iFrameURL to the appropriate SDK
- Your user will be able to filter and search for the account they want to connect. Mesh will manage the authentication flow and handle MFAs for all integrations that support transfers v2.
- After your user successfully enters their credentials, in the return method you will receive an auth_token.
- Your user initiates a transfer by selecting the eligible assets
- Your user configures a transfer by inputting amount to transfer
- Your user is given preview of transfer details (including origin account, destination address, symbol, network, amount, estimated gas fee)
-
Your user submits the transfer
- If user is transferring from self-custody wallet, then the user is redirected to wallet platform to execute transfer
- If user is transferring from centralized exchange, then Mesh sends instructions to exchange to execute the transfer
- Your user will be returned to a transfer confirmation screen after the transfer has been successfully confirmed by the origin account

Request
Response
linkToken, you can use it to initialize the Mesh Link SDK. Mesh Link SDKs are a drop-in client-side module available for web, iOS, and Android that handles the authentication process and facilitate transfers. This is what your users use to connect to their accounts, configure and execute their transfers.
TransferFinishedPayload, that’s content can be the following:
How to initiate a transfer after a user has previously authenticated
- Generate a new Link token with payload providing
transferOptionsalong withtoAddressesas shown below and described in API reference
- Initiate the web SDK using
createFrontConnectionfunction and provide theaccessTokensparameters that was obtained previously (Note: Only provideaccessTokensas shown below). The type of the access tokens object is exported asIntegrationAccessTokentype from the@meshconnect/linkpackage
- Open the transfers UI using the
frontConnection.openPopupfunction as you would on account connection flow described in the quickstart guide. This should take you straight to the Transfers UI using previously authenticated integration.
- In step 2, you can provide multiple integration access tokens. However, only the first account will be used as an origin account for transfers.
- If you provide an access token that is not supported by managed transfers, the user will see an error message stating that there are no eligible assets to transfer from the origin account. A list of supported integrations can be found here.
- If you provide an access token that belongs to a DeFi wallet, the user is prompted to connect that account again and then redirected to the crypto transfers flow.
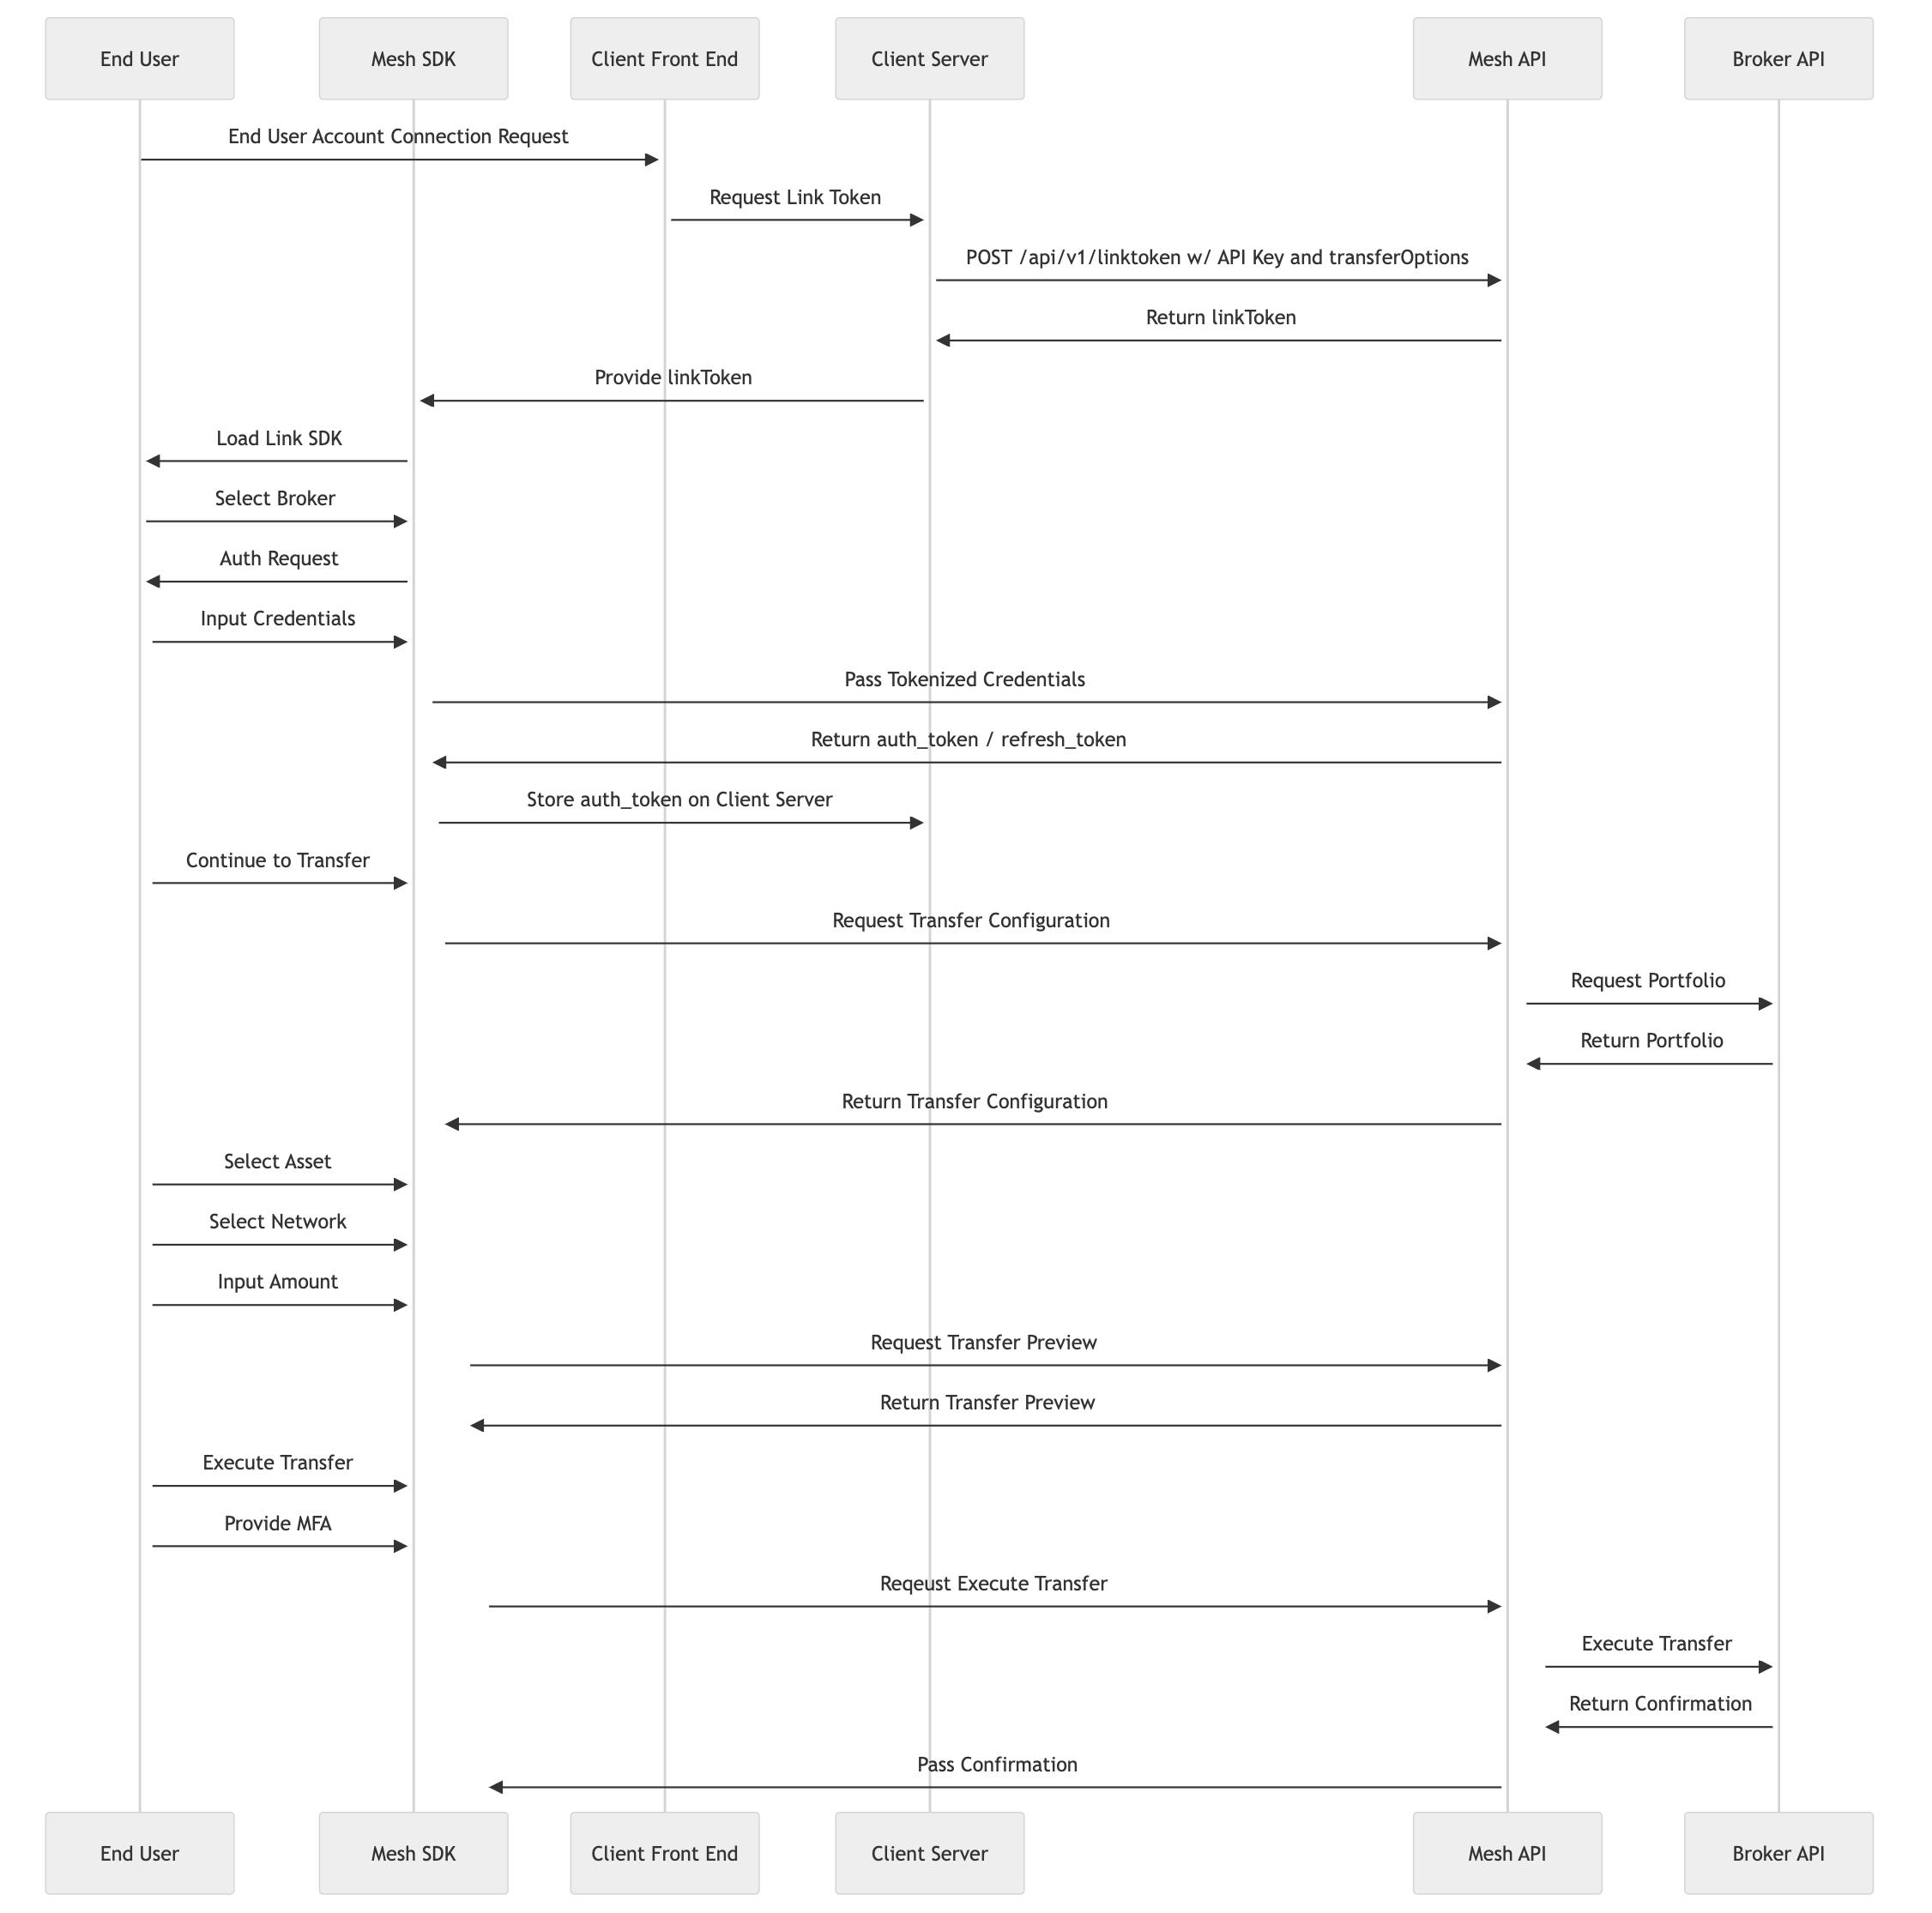
Flow Diagrams
CEX Flow Diagram
